
GolfCompat
Garmin R10 Setup: Selected Manual Notes
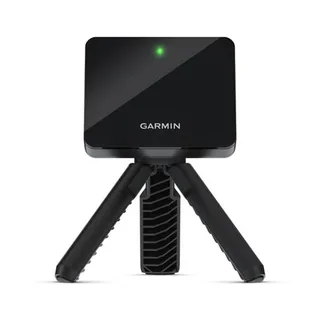
These four notes cover part of Garmin's R10 preparation procedure: fit the tripod mount, position the unit on the ground, check its height when using a mat, and point its red line toward the tee and shot target. Follow the full manual for the remaining steps, distances and indoor safety instructions.
Placement and technology
- Name
- Garmin R10
- Sensor placement
- Behind the ball
- Measurement technology
- radar
Room measurements
Table help
Scroll sideways to read all columns. Keyboard: focus the table area and use the arrow keys.
| Monitor | Dimension | Measurement endpoints | Published value | Meaning |
|---|---|---|---|---|
| Garmin R10 | Sensor to ball | sensor position to tee | 6 ft (1828.8 mm) to 8 ft (2438.4 mm) | Setup range |
| Garmin R10 | Ball flight | tee to net impact plane | 8 ft (2438.4 mm) | Minimum |
Selected setup notes
Tripod mount
Attach the launch monitor to the tripod mount
Ground placement
Place the launch monitor on the ground
When using a mat
bottom edge of the launch monitor sits above the mat
Tee and target alignment
red alignment line is aligned
Selected notes from Garmin's manual
These selected notes cover four recorded setup fields. Tripod and ground placement: fit the unit to its tripod mount before placing it on the ground. When using a mat: keep the unit's lower edge above the mat. Alignment: point the red line toward the tee location and the shot target. The source notes on the Garmin R10 monitor page link to Garmin's full Preparing for a Shot page for the ball and net distances, remaining steps and indoor safety instructions. These four recorded fields do not replace that procedure.
What the setup does not settle
These notes describe where to place and aim the unit. Room dimensions and personal swing clearance need separate checks. For the recorded distances, see the Garmin R10 space requirements page and the ceiling validator. The recorded setup fields do not assess your swing.
Related guides
R10 tripod, mat and ball checks
Use the documented tripod and alignment steps on the R10 setup page. Check the monitor height against the finished mat surface before adding a leveling stand. A third-party stand needs its own fit and adjustment check.
Check the exact ball technology and current monitor firmware with the manufacturer. RCT and RPT are different labels; a ball requirement for another monitor does not establish an R10 requirement. We have not qualified an Amazon ball or stand option for this page.
The component fit reference separates mat thickness, containment dimensions and screen space. Keep those measurements beside the R10 sensor and ball-flight distances.
Sources (3)
GSPro: GSPro Version 3
What launch monitor devices are supported?Read November 2, 2026
What launch monitor devices are supported? · Publication date not stated for this section
Garmin R10
Garmin: Preparing for a Shot
Preparing for a ShotRead November 2, 2026
Preparing for a Shot · Publication date not stated for this section
behind the tee location
Preparing for a ShotRead November 2, 2026
Preparing for a Shot · Publication date not stated for this section
bottom edge of the launch monitor sits above the mat
Preparing for a ShotRead November 2, 2026
Preparing for a Shot · Publication date not stated for this section
red alignment line is aligned
Preparing for a ShotRead November 2, 2026
Preparing for a Shot · Publication date not stated for this section
Place the launch monitor on the ground
Preparing for a ShotRead November 2, 2026
Preparing for a Shot · Publication date not stated for this section
Attach the launch monitor to the tripod mount
Preparing for a ShotRead October 18, 2026
Preparing for a Shot · Publication date not stated for this section
between 6 ft. and 8 ft.
Preparing for a ShotRead October 18, 2026
Preparing for a Shot · Publication date not stated for this section
at least 8 ft. (2.4 m) away from the net
Garmin: Accuracy of Approach R10 Radar
Radar AccuracyRead November 2, 2026
Radar Accuracy · Publication date not stated for this section
uses radar to analyze several metrics
This document supports the cited model or software requirement. We have not performed hands-on equipment testing.
GolfCompat provides planning information. Confirm the instructions for your exact equipment and have your room, swing clearance, and installation assessed before use. A listed equipment requirement does not certify personal safety.